

On this article, I’ll share a number of the finest practices for organising a brand new doc library in SharePoint 2016 and SharePoint On-line. Relying in your atmosphere and enterprise insurance policies, chances are you’ll want to regulate a few of these settings to suit your want. For instance, in Step #3 Allow Versioning, the picture exhibits an possibility for enabling solely main variations. Nonetheless, chances are you’ll be enthusiastic about each minor (draft) and main (printed) variations in your atmosphere. Use these settings as a tenet and modify them as essential to suit your atmosphere. The choice #7 is beneficial for 99.99999% of the environments. You get the trace :).
#1 – Delete the Default Paperwork Library
Everytime you create a brand new website, delete the default Paperwork library created by SharePoint as a result of it comprises an area within the title. Microsoft creates the library with an area (a foul follow) after which renames it to Paperwork. That is precisely the alternative of what Microsoft ought to have finished. The library ought to have been created with out a area and referred to as Paperwork after which it needs to be renamed to Shared Paperwork so that it’s going to grow to be extra readable and received’t have the area within the URL. Utilizing areas within the library title isn’t beneficial as a result of every area provides three additional characters (%20) within the URL. Not solely this makes it tough to learn the URL, it additionally makes the URL longer. For those who go over the beneficial URL size (256 characters), chances are you’ll not have the ability to open the file and SharePoint won’t offer you any warnings as to why the file can’t be open. For extra data try my weblog submit Good Stuff to Know About SharePoint Information, Folders, URLs, Websites and the Like, or my eBook Greatest Practices for SharePoint 2013.
As a finest follow, don’t use areas if you create the next.
- Website
- Record
- Library
- Web page
- Column
- View (for those who despatched a hyperlink to a view in an e-mail it may well probably break the hyperlink so it’s finest to keep away from areas, or to make use of underscore as a substitute of an area to make it extra readable)
#2 – Create a New Doc Library with out a House within the Title
- Create a brand new doc library, e.g. SharedDocs, with out a area within the title.
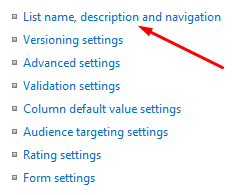
- After the library is created, rename the doc library in Library Settings -> Title, description and navigation to Shared Paperwork or no matter else you wish to name it. This makes the library extra readable however retains the title of the library within the URL as SharedDocs, which doesn’t comprise an area.
#3 – Allow Versioning
Within the Library Settings, go to Versioning settings and choose from one of many two choices.
- Create main variations
OR - Create main and minor (draft) variations
Restrict the variety of variations to retain to not more than 10. 5 or much less is even higher. If you choose the choice to create each main and minor variations then ensure you additionally restrict the variety of minor variations.

SharePoint On-line is a part of Workplace 365 and is managed by Microsoft within the cloud. The default setting in SharePoint On-line permits 500 main variations. That’s a ridiculously excessive variety of main variations. Clearly, the extra variations you save, the extra space for storing you’ll use. The extra storage you utilize, the more cash Microsoft makes. Most, if not all, companies don’t want so many variations of every doc. Nonetheless, if your organization is an exception and also you do have a necessity for therefore many variations, then don’t make the change. The utmost variety of main and minor variations allowed in SharePoint On-line is 99999.
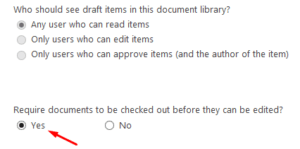
#4 – Require Paperwork to be Checked Out
This feature is positioned within the Library Settings underneath Versioning settings and is disabled by default. This step is just essential for those who plan on utilizing the Verify-in/Verify-out function, which permits paperwork to be checked out earlier than they are often edited. By testing the doc, you might be stopping others from making modifications till you examine them again in.
NOTE: SharePoint 2016 and SharePoint On-line permit a number of folks to edit a doc concurrently, with out overwriting one another’s edits. Subsequently, enabling this function is commonly not essential.
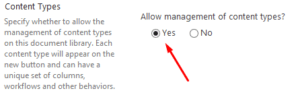
#5 – Permit Administration of Content material Sorts
If you’re working with Content material Sorts then this setting applies to you. For those who don’t know what Content material Sorts are and tips on how to use them, then don’t allow this feature.
Within the Library Settings, choose the hyperlink for Superior settings and set the choice to Permit administration of content material sorts to Sure. By enabling this function, the Content material Sorts part is added to the Library Settings space.
NOTE: You’ll solely want this feature if you’re working with Content material Sorts.
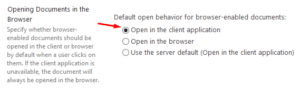
#6 – Configure the Possibility for Opening Paperwork within the Browser
Within the Library Settings, choose the hyperlink for Superior settings and configure the choice for opening paperwork within the browser to Open within the consumer software.
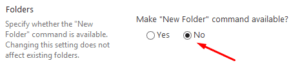
#7 – Disable the Use of Folders in Libraries
For those who solely wish to make one change in your library settings, this needs to be the one. By default, the choice to create a folder is disabled in lists, however enabled within the libraries. Folders are outdated method of organizing knowledge and are discouraged in SharePoint as a result of they make it tough to arrange and work with knowledge.
Within the Library Settings, choose the hyperlink for Superior settings and set the choice to Make “New Folder” command accessible? to No. As I discussed earlier, nearly each group ought to make this alteration.
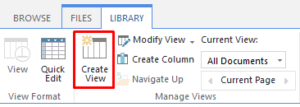
#8 – Create a New Default View
As a substitute of modifying the default view, create your personal customized default view.
- Go to the doc library, e.g. Paperwork, and on the Library tab choose Create View.
- Within the Selected a view format part choose Normal View.
- Within the View Title field enter Default_View.
- Choose the choice to Make this the default view.
- Customise the columns that will likely be displayed. Your display could not look precisely just like the screenshot under however you get the thought.
NOTE: The Doc ID column is just accessible if the function has been enabled on the Website Assortment degree by the SharePoint administrator.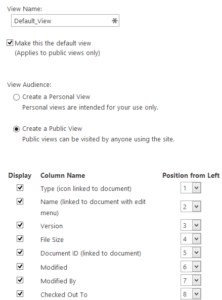
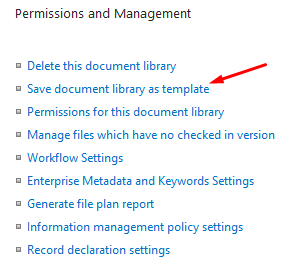
#9 – Save the Doc Library as a Template
Save the doc library as a template earlier than you add any knowledge. Title the template one thing like Doc Library Template and let different Website Directors know to make use of this library as a template once they create new doc libraries. The choice to Save doc library as template is out there in SharePoint 2016 within the Permissions and Administration part of the Library Settings.